Identify and eliminate bottlenecks in your application for optimized performance.
Solving .NET Validation Challenges with FluentValidation
Data validation is one of the first steps towards cleaning data before you can process and manipulate it. It ensures that the data is reliable and complies with your organization’s rules. These rules might include the following:
- Restricting a maximum length of a variable or field
- Ensuring the correct format of input, such as for emails
- Ensuring the user input always contains certain keywords
Data annotation is a popular method of validation in the ASP.NET framework. You can use data annotation with model classes to validate user inputs and create alerts to warn users of anomalies. Data validation enables you to add attributes to a class property, like a required attribute that marks a property as mandatory.
Despite their usefulness, data annotations come with several drawbacks. For example, combining code logic and variable validation in the same place can cause code bloat. Additionally, annotations reduce the extensibility and maintainability of the code. Fortunately, FluentValidation helps address these issues.
FluentValidation is a free .NET library that helps you quickly and easily implement validation rules. With FluentValidation, you create a separate public class for your rules, encouraging maintainability and preventing code bloat issues.
In this hands-on demonstration, you’ll learn how to validate ASP.NET code by implementing an ASP.NET web API with FluentValidation.
Validating ASP.NET Code with FluentValidation
In this tutorial, you’ll code a basic API with .NET. You’ll use FluentValidation to add some validation rules, then test using Postman. Upon completion, you’ll have experienced how FluentValidation ensures that your validation code is clean, maintainable, and easy to create.
Prerequisites
Before getting started, ensure you have the following:
- ASP.NET and Postman installed
- A foundational knowledge of C#
- Experience with a terminal and an integrated development environment (IDE), such as Visual Studio or Visual Studio Code (VS Code)
- Basic familiarity with APIs
Creating an API
You’ll start by creating a profileAPI using dotnet. This API has several variables for storing user details, including those obtained during registration.
First, open your terminal. This demonstration uses the built-in terminal in VS Code. If you’re also using VS Code, you can automatically launch the terminal with the Ctrl + Shift + ` shortcut or by clicking Terminal and then New Terminal.
Within the terminal, create a new web API project in your desired directory using the following command:
dotnet new webapi -o profileAPI
The above command creates a new folder named profileAPI within the directory. This is where you’ll code your API. The code snippet above will run as shown in the image below:
 Fig. 1: The output of the dotnet new webapi -o profileAPI command.
Next, you’ll use cd to move to the profileAPI folder and run the following commands on your terminal:
dotnet add package Microsoft.EntityFrameworkCore.InMemory

code -r ../profileAPI
These commands add the required packages, and the last command will open the profileAPI directory in Visual Studio Code.
Now, when you look at the file directory, it will look like the image below.
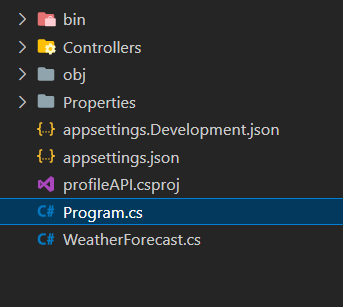 Fig. 2: profileAPI file directory.
You’ll notice the project template creates a WeatherForecast API. You can ignore this API, as you’ll be making your own.
Since you’ll be running the API on the host and working with HTTP requests, you need to allow your security system to trust the HTTP server by running the following command:
dotnet dev-certs https --trust
The following security warning will display:
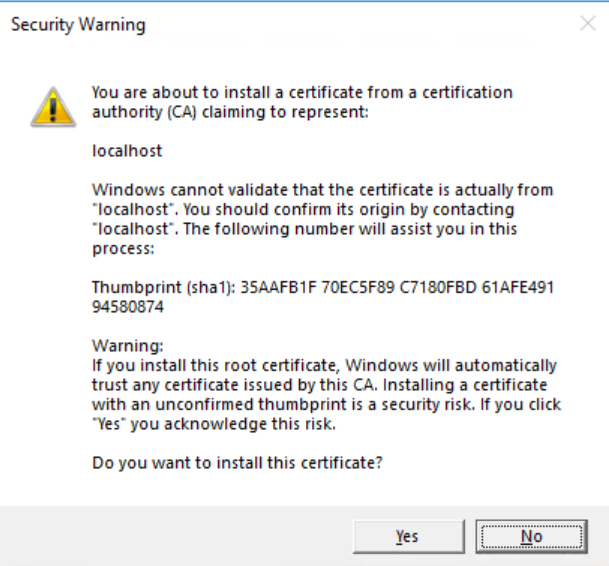 Fig. 3: A security warning that allows you to trust the HTTP server.
Click Yes.
The --trust command above will add a certificate to Windows, allowing it to run the API smoothly. You might also get the following output:
 Fig. 4: Potential output from running dotnet dev-certs https --trust.
This message means that you already have an encrypted and verified HTTPS certificate, so you won’t have to install one.
Next, create a Models folder within the profileAPI directory. This is where you’ll save your Model classes. Model classes can be saved anywhere in the program. Using the Models file is standard practice.
Within the folder, create a file called ProfileAccount.cs and add the code below:
ProfileAccount.cs

namespace profileAPI.Models
{
    public class ProfileAccount
    {
        public string? NationalId { get; set; }
        public string? FullName { get; set; }
        public int Age {get;set;}
        public int PhoneNumber {get; set;}
        public string? PersonalEmail {get; set; }
        public string? HomeAddress {get; set;}
    }
}
Then, create a ProfileContext.cs file within the same Models directory and add the code below:
using Microsoft.EntityFrameworkCore;
using System.Diagnostics.CodeAnalysis;
namespace profileAPI.Models
{
public class ProfileContext : DbContext
{
public ProfileContext(DbContextOptions<profileContext> options)
: base(options)
{
}
public DbSetProfileAccounts { get; set; } = null!;
}
}
Then, within the Program.cs file, add the following libraries:
using Microsoft.EntityFrameworkCore;
using profileAPI.Models;
Below the AddController() command, add the database context:
builder.Services.AddControllers();

builder.Services.AddDbContext<ProfileContext>(opt => opt.UseInMemoryDatabase("ProfileAccount"));
Next, run the following set of commands in the terminal. Please note that if you already have dotnet-aspnet-codegenerator installed, you don’t need to run the penultimate command, which installs the dotnet-aspnet-codegenerator package:
dotnet add package Microsoft.VisualStudio.Web.CodeGeneration.Design

dotnet add package Microsoft.EntityFrameworkCore.Design

dotnet add package Microsoft.EntityFrameworkCore.SqlServer

dotnet tool install -g dotnet-aspnet-codegenerator

 dotnet-aspnet-codegenerator controller -name ProfileController -async -api -m ProfileAccount -dc ProfileContext -outDir Controllers
Note that if you get an error on the last command, you can create the ProfileController file manually in the controllers directory and proceed with the remaining steps.
The commands will do the following:
- Add NuGet Packages
- Install the scaffolding engine
(dotnet-aspnet-codegenerator) - Scaffold the ProfileController
The above commands will create a ProfileController.cs file within the controllers directory.
Now, when you open the ProfileController.cs file, you’ll see it contains an array of GET, HTTP POST, and PUT commands. Delete those commands and replace the code with the HTTP Post code below:
using System;
using System.Collections.Generic;
using System.Linq;
using System.Threading.Tasks;
using Microsoft.AspNetCore.Http;
using Microsoft.AspNetCore.Mvc;
using Microsoft.EntityFrameworkCore;
using profileAPI.Models;
namespace profileApi.Controllers
{
[Route("api/[controller]")]
[ApiController]
public class ProfileController : ControllerBase
{
private readonly ProfileContext _context;
public ProfileController(ProfileContext context)
{
_context = context;
}
[HttpPost]
public async TaskPostprofileAccount(profileAccount profile)
{
return Ok("Success");
}
}
}
Since you’re only using the API to test FluentValidation, this tutorial only reviews POST HTTP requests. Additionally, for simplicity, this demonstration has you return a "Success" string. However, if you were writing this code for a real-world problem, you might save the profile details within a database.
Validation Rules with FluentValidation
Now, you’ll add some rules for data validation using FluentValidation. To install FluentValidation on your device, create a new directory Validator. Then, run the following command in your terminal:
dotnet add package FluentValidation.AspNetCore
Next, you’ll add the rules using FluentValidation by creating a new class file, ProfileAccountValidators.cs, in the Validator directory.
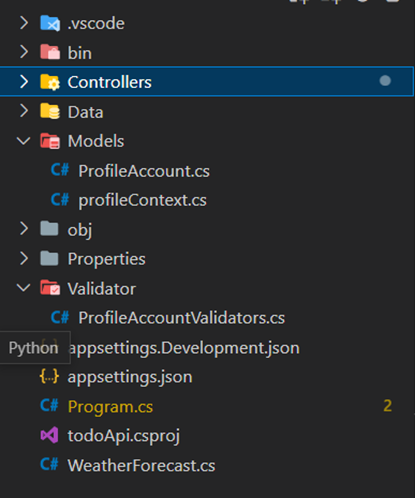 Fig. 5: The Validator directory, which contains the ProfileAccountValidators.cs file.
Next, create a class called ProfileAccountValidator in the ProfileAccountValidators.cs file.
Now, you’ll import the FluentValidation library and your profile API model in the validators.cs file. You’ll then add your validation rules for the model in validators.cs using the code below:
using FluentValidation;
using profileAPI.Models;

  public class ProfileAccountValidator : AbstractValidator <ProfileAccount>
    {
        public ProfileAccountValidator()  //we add rules here
        {
            RuleFor(p => p.NationalId).NotEmpty().MinimumLength(13);
            RuleFor(p => p.FullName).NotNull().MaximumLength(30);
            RuleFor(p => p.Age).GreaterThan(10).WithMessage("Minimum age to create profile is 10");
            RuleFor(p => p.PersonalEmail).EmailAddress();
            RuleFor(p => p.HomeAddress).NotNull()
            .Must(a => a? .ToLower().Contains("house") == true);
        }
    }
The above code sets the following rules:
NationalIdcan’t be empty, and the minimum length will always be 13.FullNamecan’t be null, and the maximum allowed length will be 30.Ageshould be greater than 10.WithMessage()commands will appear when you try to enter an age less than 10.PersonalEmailensures the format of the input email is correct.
If you need to, you can add more validators. FluentValidation has a vast range of built-in validations, including items like credit card validation and both inclusive and exclusive number range validation.
You will need to make changes to the Program.cs file to include the FluentValidation library by adding the following:
using FluentValidation.AspNetCore;
Second, extend the AddControllers command to be the following:
builder.Services.AddControllers().AddFluentValidation(fv => {
    fv.RegisterValidatorsFromAssemblyContaining();
});
Testing the API Via Postman
Next, you’ll test the API using Postman. To begin, run the API in your browser. This demonstration uses Google Chrome.
Then, open up Postman on your computer. Before testing, you’ll need to configure Postman to be able to send requests in JSON format.
First, go to the Headers tab in Postman. Change the Key to Content-Type and the Value to application/json.
 Fig. 6: The Headers tab in Postman.
Then, change the trigger method to POST.
After you’ve launched the API, confirm the port value to enable you to create the requests are used to ask the server to fetch some information or data for the client in Postman.
To get the port value, launch the API in your IDE. This should open in your web browser. However, it might show an error like below:
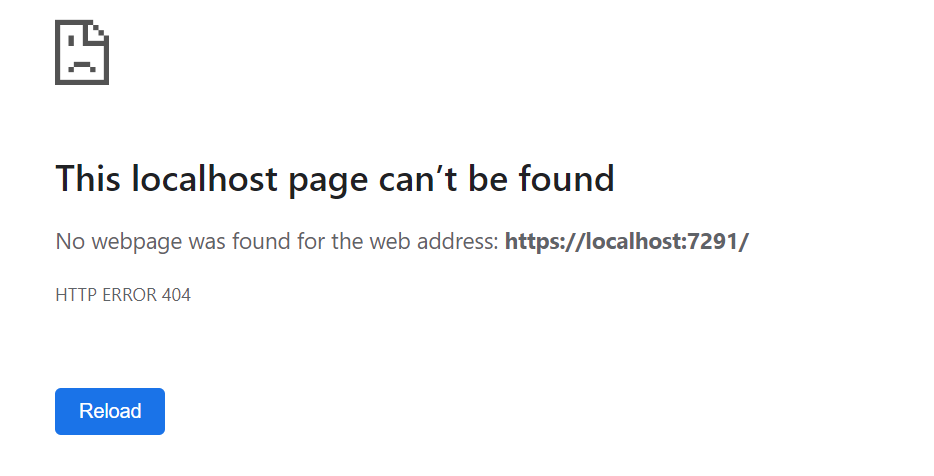 Fig. 7: A localhost loading error.
If this error displays, edit the URL by adding /swagger to it, like so:
https://localhost:7291/swagger
When you press enter, you’ll be directed to the Swagger UI, which visually renders information of the API. As the API receives data, you can view it through Swagger UI as well.
Note that you can also view your port value from the generated link. For example, in this demonstration, the port is 7291.
To get the request URL, use the following template:
https://localhost:<port>/api/<APIValue>
If unsure of what to write under your API value, open up the web page, and copy the required piece of the URL, as shown below.
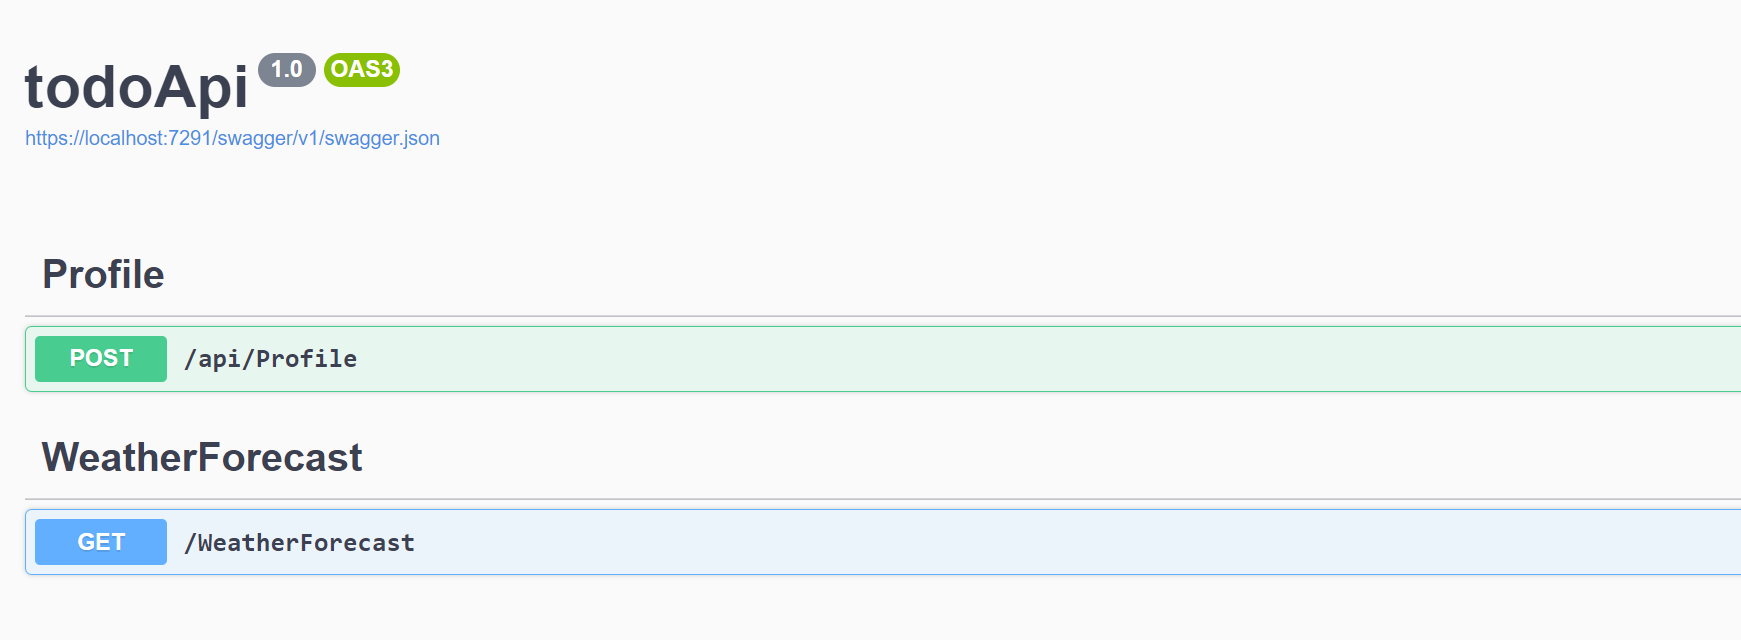 Fig. 8: todoApi via the Swagger UI.
Since you’re testing with Profile, you use the /api/profile link.
Now, when you open Postman, the URL looks like this:
 Fig. 9: The URL in Postman.
When you click on the Body tab, the type should be JSON, as shown below.
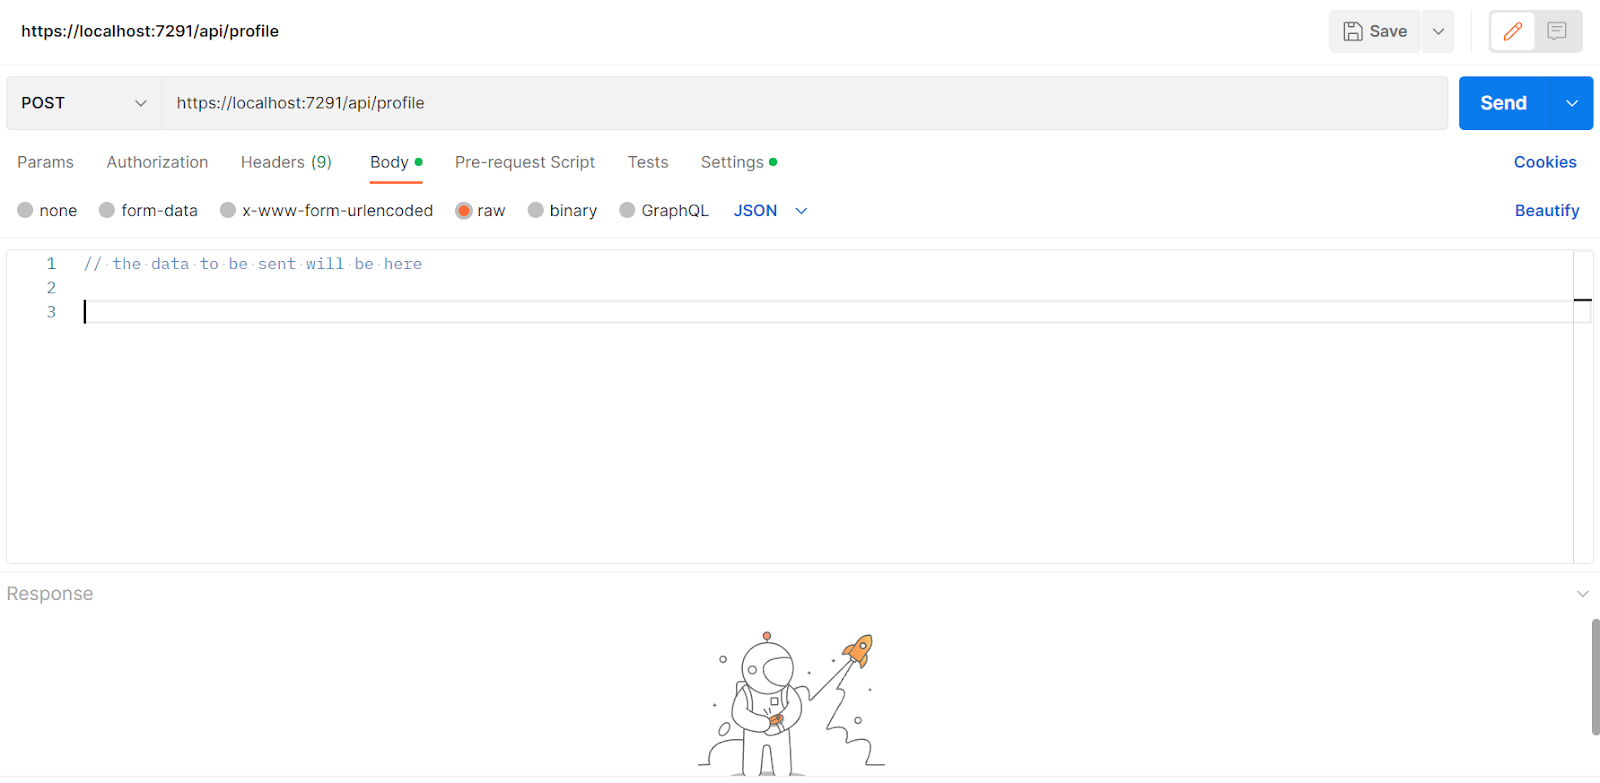 Fig. 10: The Body tab in Postman.
Testing the API Using Postman
Next, you’ll test Postman and the API to see if they’re working correctly. But before getting started, you’ll need to disable SSL certificate verification in Postman, as you can potentially run into certificate verification issues with Postman.
In Postman, go to Settings, stay on the General tab, and under Request, turn the SSL certificate verification toggle bar off.
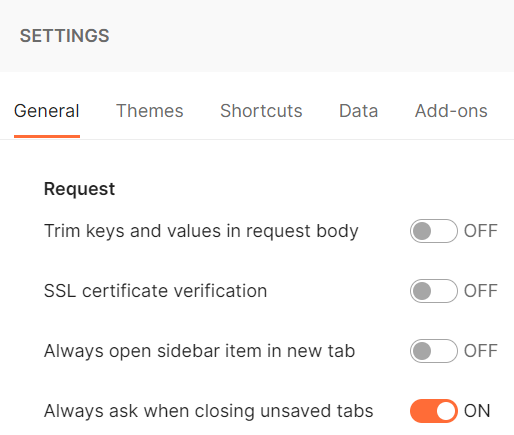 Fig. 11: The SSL certificate verification toggle switched to off.
Next, copy the following sample JSON values into the body. This sample data will be sent to the API.
{
  "nationalId": "1234567891012",
  "fullName": "john green",
  "age": 25,
  "phoneNumber": 12345678,
  "personalEmail": "sample@gmail.com",
  "homeAddress": "street 7, house 9"
}
Since the values adhere to the rules set earlier, the code is compliant and the operation — sending values to the API — is successful. The API will label the status as Status 200 OK, as shown on the bottom right of the image below:
 Fig. 12: Sample values and the return status of the API test in Postman
Triggering the Validation
Now, it’s time to trigger some of the validation sequences.
Begin by changing the number of characters in nationalID from 13 to 4. Remember that you need a minimum of 13 characters to pass the validation check.
Then, change the age from 25 to 7.
The updated data will look like the following:
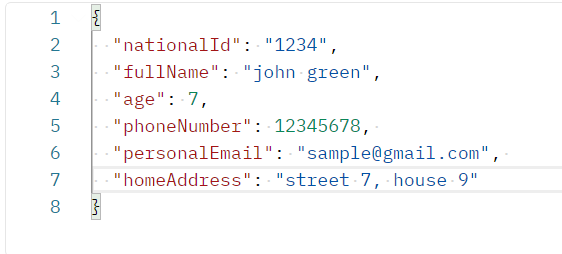 Fig. 13: Updated JSON data in Postman.
Then, send the data to the API using the Send button at the top of the screen. Once you send the data, it will trigger the following validation checks, as shown below:
 Fig. 14: The validation checks.
Take note of the following events within the validation check:
- When the validation check is triggered, the return status is 400 — a bad request. A bad request is triggered when the server can’t — or won’t — process the incoming data. In this example, because the validation didn’t pass, the server refuses to process the data and rejects the data stream.
- For
nationalID,you can view the error made by the input that was returned by FluentValidation. - For
age,where you specified the message to return if the check fails, you’ll see that the minimum age requirement message appears.
Now, make one more change in the JSON data. Remove the house number (house 9) from homeAddress. Your JSON data should look match the following:
{
  "nationalId": "1234",
  "fullName": "john green",
  "age": 7,
  "phoneNumber": 12345678,
  "personalEmail": "sample@gmail.com",
  "homeAddress": "street 7"
}
Now, you’ll see the following validation errors:
 Fig. 15: Updated validation errors, including one for homeAddress.
Looking at the output above, you can see that while some conditions, such as age, give you clear details about the problem, others, like the homeAddress, don’t clearly articulate what the error stems from.
To improve the clarity of your error messages, you can use the WithMessage method. To see this method’s impact, edit the homeAddress rule in the ProfileAccountValidator class you created earlier using the following code:
RuleFor(p => p.HomeAddress).NotNull()
            .Must(a => a? .ToLower().Contains("house") == true)
            .WithMessage("Home Address must always contain the word house.");
Now, power up the API again and send the previous request again from Postman with the following JSON input:
{
  "nationalId": "1234",
  "fullName": "john green",
  "age": 7,
  "phoneNumber": 12345678,
  "personalEmail": "sample@gmail.com",
  "homeAddress": "street 7"
}
Now, the error for homeAddress will look like the following:
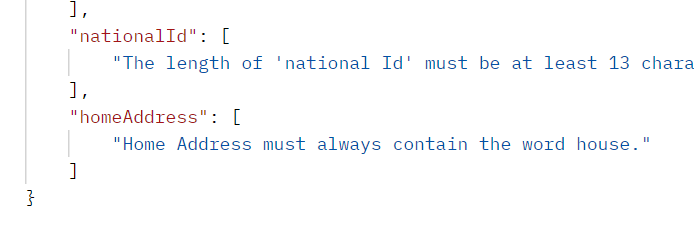 Fig. 16: Updated error description for homeAddress.
Conclusion
FluentValidation is a powerful library used for data validation by ASP.NET. It includes several built-in validators and allows users to create reusable custom validators.
FluentValidation enables you to write cleaner, more maintainable, and better code by removing the need for data annotations as you create a separate public class to test your models. And as you’ve seen throughout this demonstration, FluentValidation makes it easy to implement and test for adherence to validation rules.
